Crawl and index the site with scrapy and zyte
February 2024
Now that the integration of the search engine is finalized, the goal seems within reach. The final step involves retrieving the content and populating the Algolia index. This article provides a comprehensive guide on utilizing Scrapy and Zyte to accomplish this task.
The final push in this process marks the culmination of transforming an architectural vision into a tangible and functional feature. To rephrase, it signifies the transition from conceptualization to tangible realization, turning an idea into an actionable and usable product. It represents the shift from being an idea person to someone actively engaged in bringing those ideas to fruition.
With that in mind, let’s get on with it!
Why scrapy?
Scrapy is an open source and collaborative framework for extracting the data you need from websites. It’s written in Python.
In a fast, simple, yet extensible way.
Crawling the site
First, install Scrapy:
pip install Scrapy
Then, create a new project:
scrapy startproject demo
This creates a project that you can already use, but it doesn’t do much yet. For this site, let’s look first at how to tell the spider what URL to start with:
class ExampleSpider(scrapy.Spider):
    name = "example"
    allowed_domains = ["plagelao.github.io"]
    start_urls = [
            "https://plagelao.github.io/articles/",
            ]
    ...
The spider has a property start_urls. You can add an array of URLs for the spider to crawl. In this case, it only adds the articles page.
The next step is to configure the spider to parse the articles page and follow each of the articles:
    ...
    start_urls = [
            "https://plagelao.github.io/articles/",
            ]

    def parse(self, response):
        for article_url in response.xpath('//h3/a/@href'):
            url = response.urljoin(article_url.extract())
            yield scrapy.Request(url, callback = self.parse_article)
    ...
Scrapy allows both CSS or XPath selectors. In this case, it uses the XPath selector to find all the a tag elements that are inside an h3 tag element, and it extracts the href attribute. It iterates on the collection and, for each URL, it creates a new Scrapy request with a custom callback to the method that extracts the content from the article page.
    ...
    def parse_article(self, response):
        item = Article()
        item['title'] = ' '.join(''.join(response.css('h2 *::text').extract()).split())
        item['body'] = ' '.join(''.join(response.css('article *::text').extract()).split())
        item['excerpt'] = ' '.join(''.join(response.css('article p:first-child::text').extract()).split())
        item['tags'] =  response.css('.tag::text').extract()
        item['url'] = response.url
        item['objectID'] = response.url
        yield item
    ...
The method is using multiple CSS selectors to extract the interesting fields from the page, and then adds them into an Article item.
This is all you need in the spider to start fetching content!
Adding the content to the Algolia index: Pipelines
Scrapy defines item pipelines as:
A Python class that implements a simple method. Receives an item and performs an action over it, also deciding if the item should continue through the pipeline or be dropped and no longer processed.
You can use pipelines for many things, from validating the data, to storing the data in a database, or just to check for duplicates, to name a few options.
In this case, the pipeline submits records to an Algolia index. For that, it first needs to configure the algoliasearch client:
from algoliasearch.search_client import SearchClient
from demo.items import Article

CONFIG_INDEX = "ALGOLIA_INDEX"
CONFIG_WRITE_API_KEY = "ALGOLIA_WRITE_API_KEY"
CONFIG_APPLICATION_ID = "ALGOLIA_APPLICATION_ID"

class DemoPipeline:
    def __init__(
        self,
        application_id,
        write_api_key,
        index
    ):
        if None in {application_id, write_api_key, index}:
            self._enabled = False
        else:
            self._enabled = True
            self._client = SearchClient.create(application_id, write_api_key)
            self._index = self._client.init_index(index)

    @classmethod
    def from_crawler(cls, crawler) -> "DemoPipeline":
        return cls(
            application_id=crawler.settings.get(CONFIG_APPLICATION_ID),
            write_api_key=crawler.settings.get(CONFIG_WRITE_API_KEY),
            index=crawler.settings.get(CONFIG_INDEX),
        )
    ...
This code block is a bit long but, in essence, it is configuring the Algolia search client by providing an index name, an applications id, and an api key. It expects that data via environment variables.
Once the client is configured, the next step is to process each of the items:
    ...
    def process_item(self, item, spider):
        if self._enabled:
            self._index.save_object(dict(item))
        return item
    ...
It converts the item into a dictionary, and saves the object in the algolia index.
That’s all you need to submit your content into an Algolia index using Scrapy!
Running from your local machine
You can run the example spider in your local machine with:
scrapy genspider example plagelao.github.io/articles/
And it shows you all the items as a result. This is a way to easily check if you are getting what you expect.
You can just run Scrapy from your computer but, with little effort, you can get your spiders in the cloud and schedule jobs to update your search engine every week. Honestly, with Zyte, it’s really a small effort.
Why Zyte?
Zyte is the maintainer of Scrapy, and using their platform simplifies the infrastructure a lot.
The point of this series of articles is to demonstrate an architecture, so using an off the shelf product makes this a simpler task.
If you are using this in production, you need to make a cost effective analysis between the different options, but that’s outside of the scope of this article.
For a demo, Zyte free plan is enough, and that’s what this article is going to use. If you want to follow along, create a free plan in Zyte first.
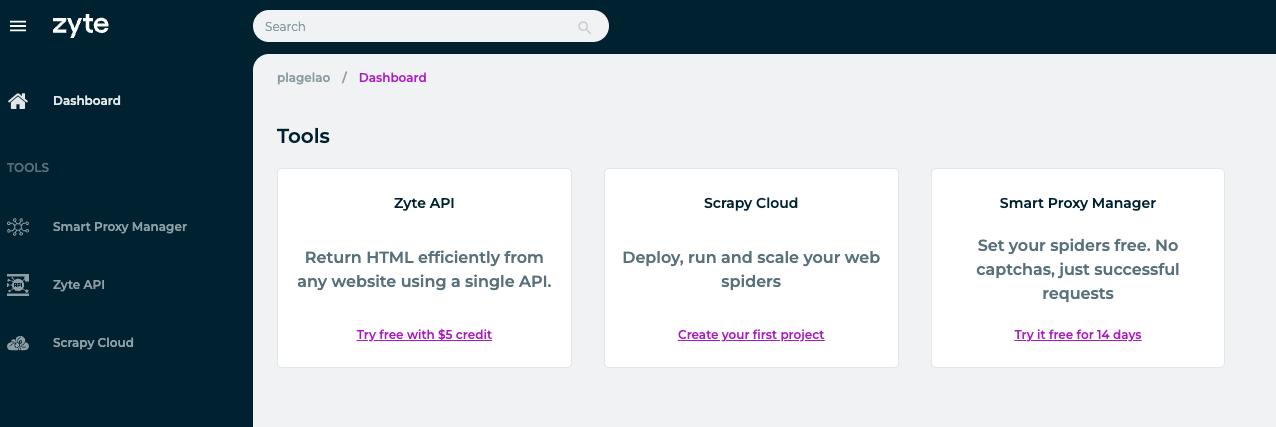
After creating the plan, Zyte presents the dashboard view with all their products. For the Scrapy integration you need to choose to create a new project in Scrapy Cloud:
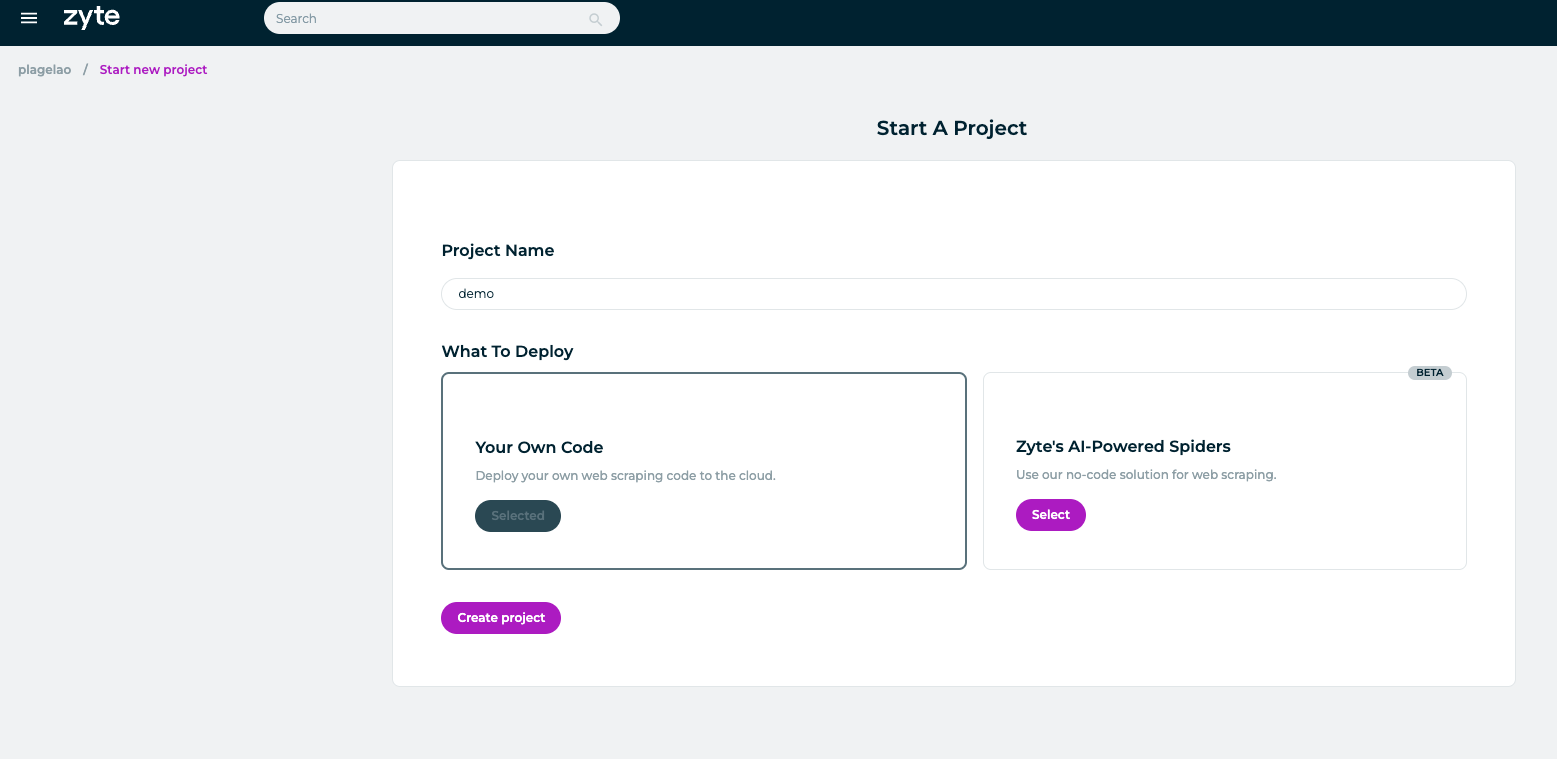
Name your project and choose to deploy your own code:
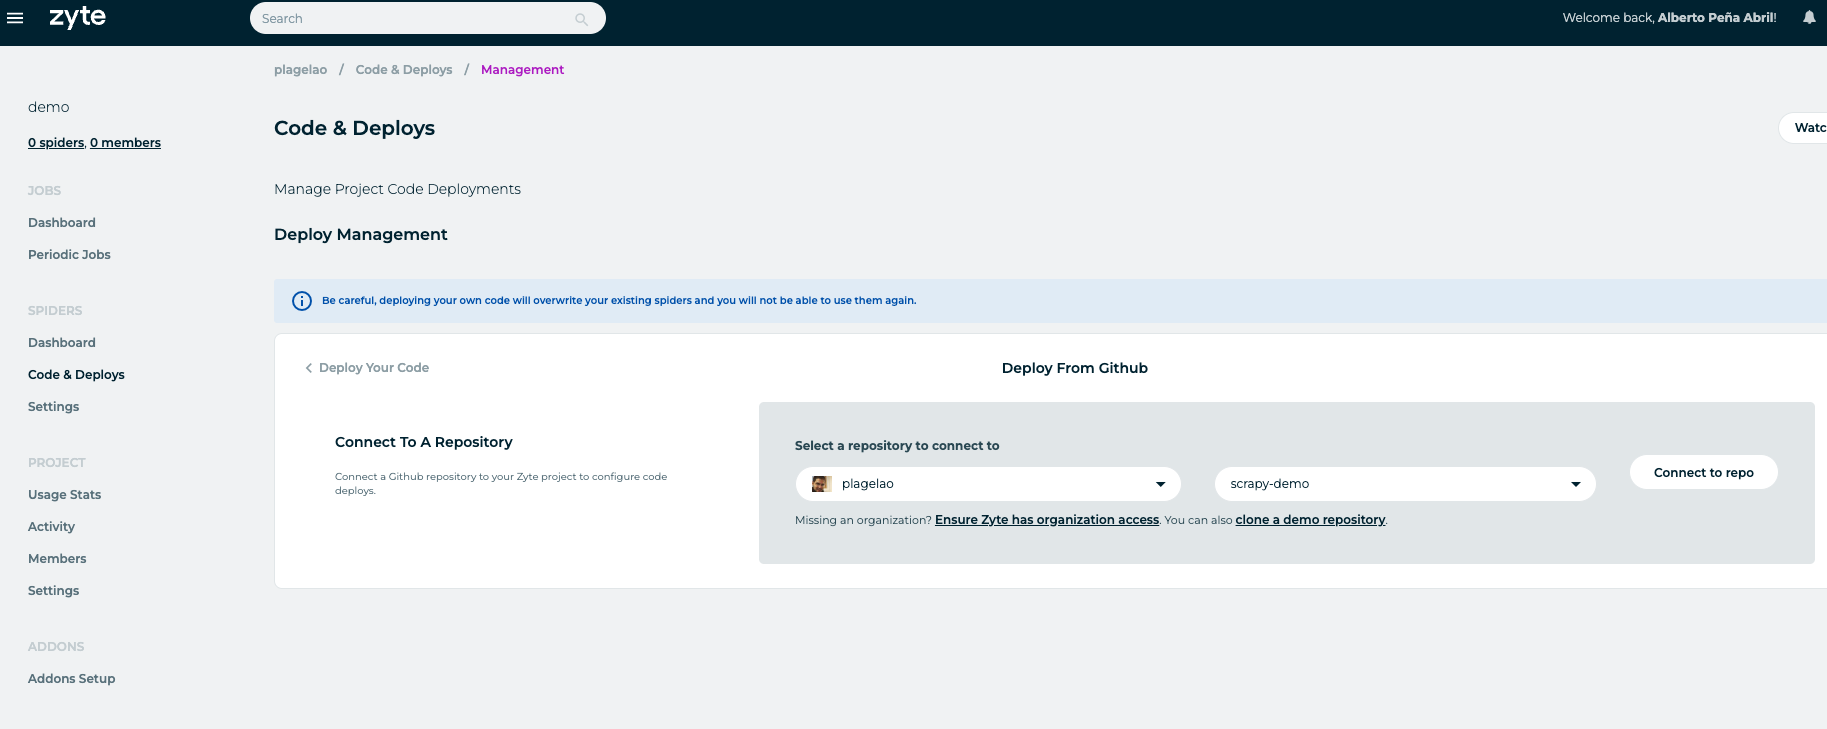
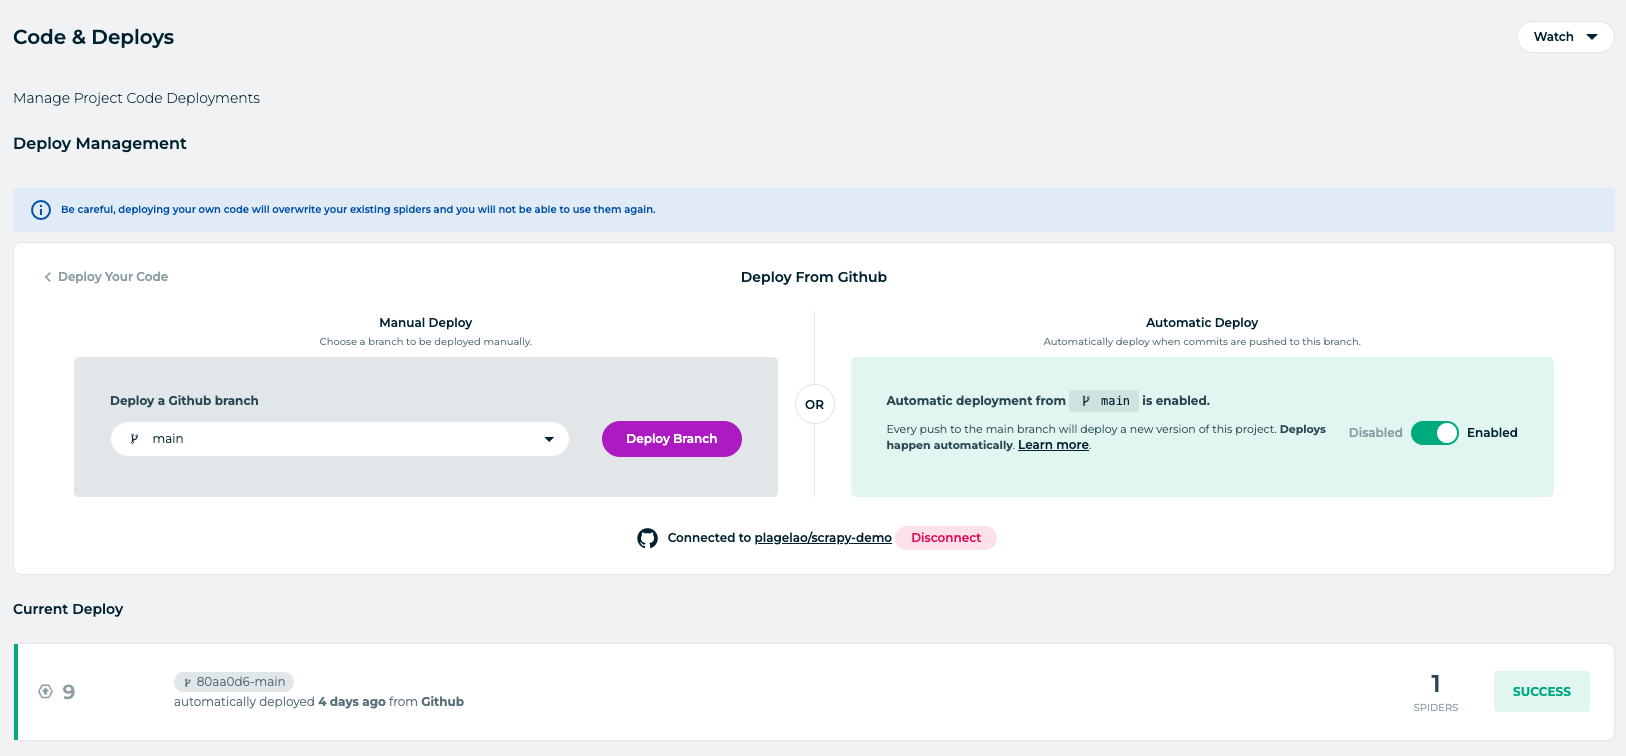
Once the project is created, visit the Code & Deploys section. Zyte allows you to deploy from GitHub. That feature is enough for what you want to achieve. Link your Scrapy repo:
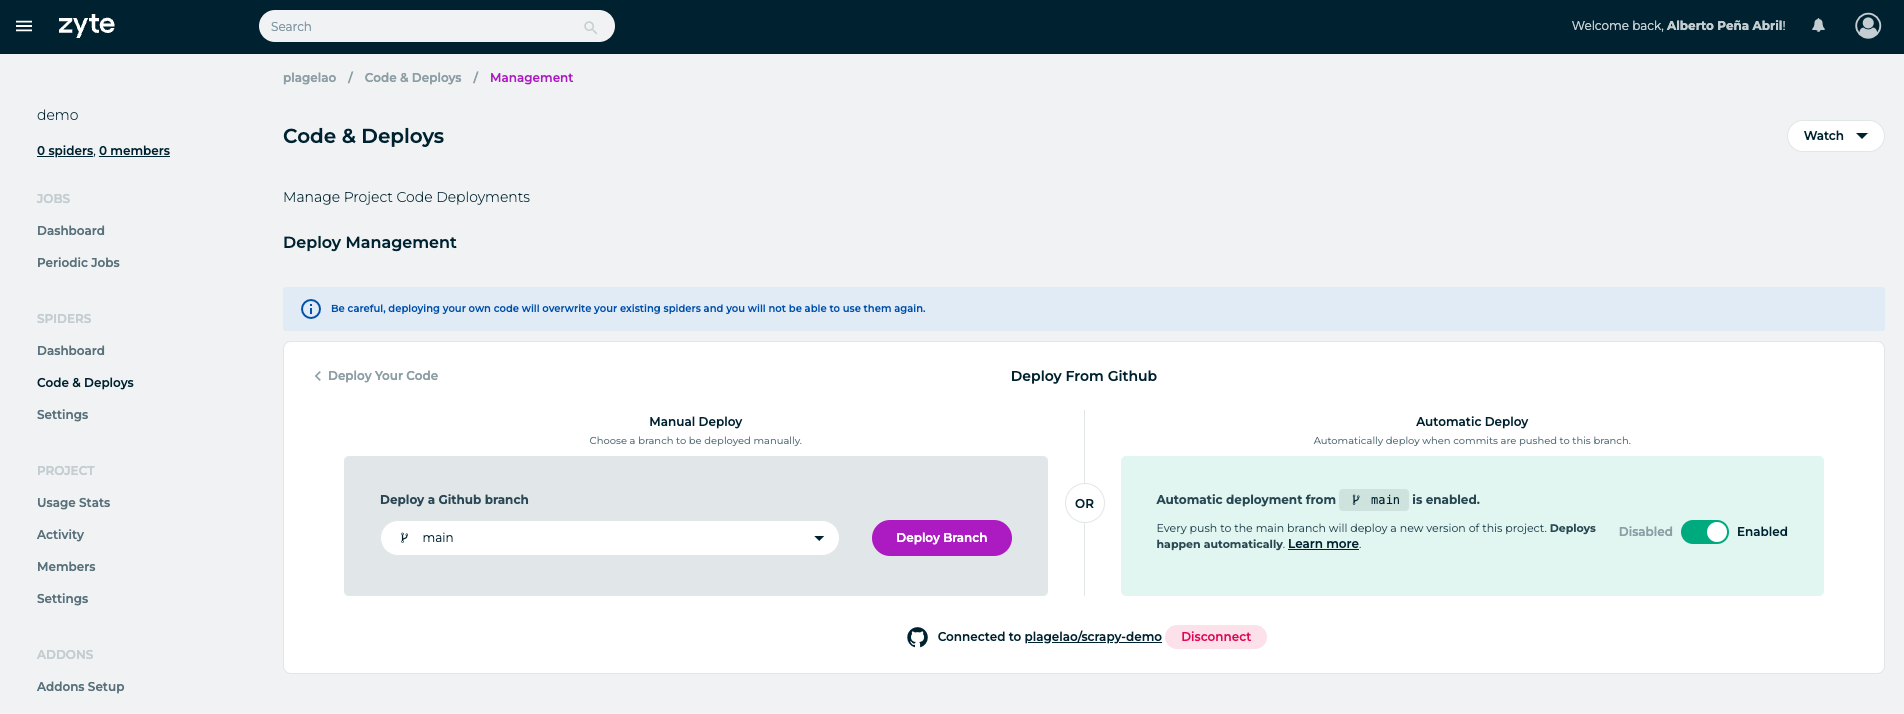
Once linked, everytime you push, Zyte deploys the code into Scrapy Cloud. This is how the linking shows for the demo in this article:
If you try to deploy now, by pushing a new commit to your GitHub repository, it will fail. There is two files that you need to add to your Scrapy GitHub project, scrapinghub.yml and requirements.txt.
scrapinghub.yml is a configuration file. You can read more about it in the official documentation page. For this project, it looks like this:
projects:
  default: 735731

requirements:
  file: requirements.txt
requirements.txt is the file that defines the external modules that your project uses. In this article, the only dependencies are algoliasearch and a bunch of Scrapy default dependencies. The files looks like this:
algoliasearch==3.0.0
certifi==2024.2.2
charset-normalizer==3.3.2
idna==3.6
requests==2.31.0
urllib3==1.25
Once you have those two files, any new push creates a successful deployment.
The last bit is to run the spider from Zyte, which you can do by visiting the section Dashboard and clicking the Run button:

Then you choose what spider or spiders to run:
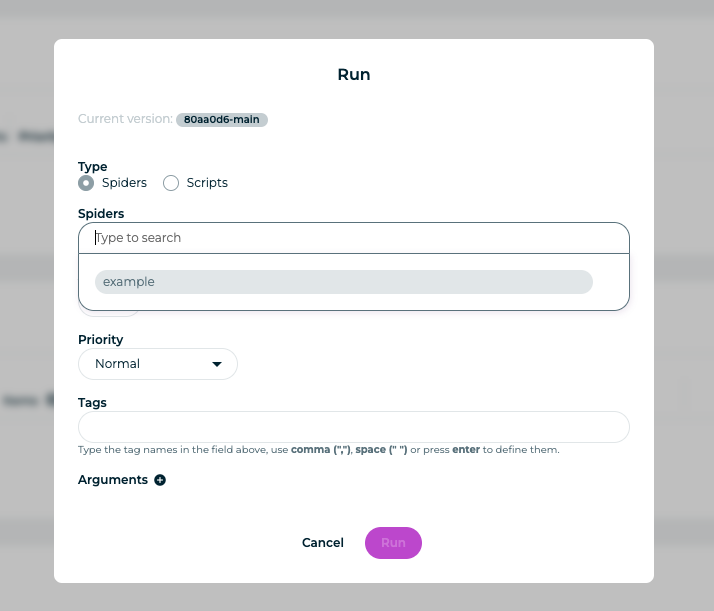
After confirming the selection, Zyte queues the jobs. If everything works, you end up with something like this:
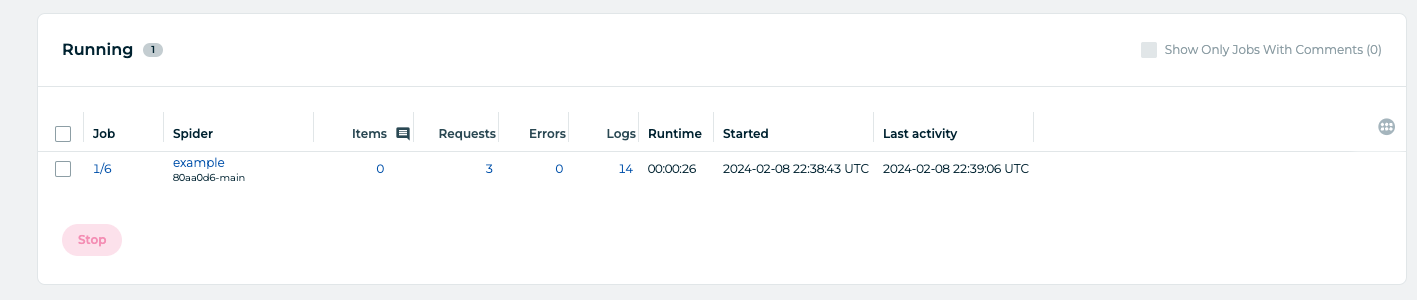
There is one missing piece though, if you visit your Algolia index, you can see that nothing has been indexed yet. That’s because you haven’t added the environment variables to Zyte yet. You can do that in the Spider settings section:
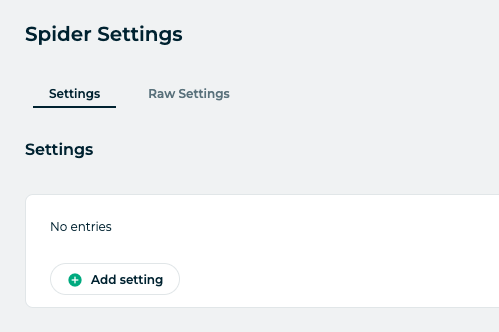
My recommendation is to use the Raw Settings tab:
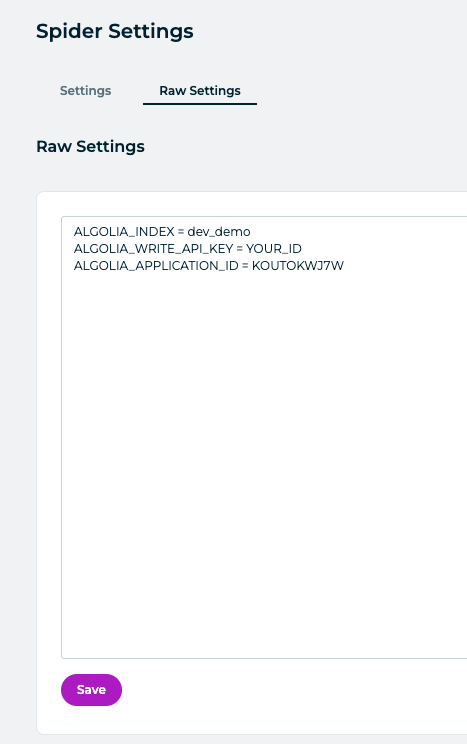
Save the new settings and try to run the spider jobs again. This time, your Algolia index is updated and your search UI is returning many more results.
Once you double check that the jobs are doing what you want, you can schedule them to run regularly to keep your index up to date.
That’s all!